自治体様で連携アプリを作成して連携する手順をご説明いたします。
Ⅰ, Twitterの連携アプリの作成
あらかじめ、連携するX(旧Twitter)のアカウントにログインしておいてください。
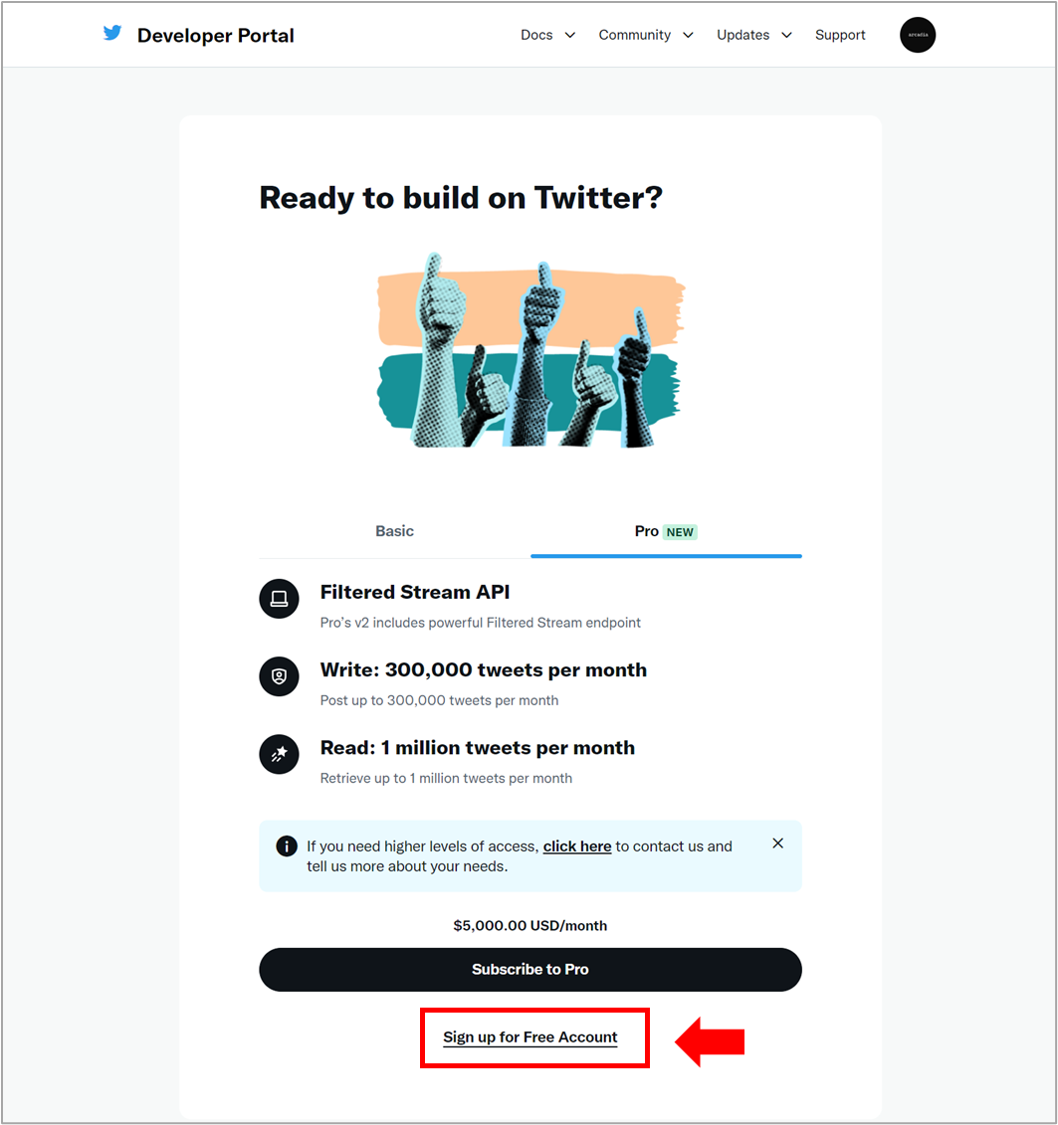
1,X 開発者プラットフォームへアクセス
2,画面右上の「開発者ポータル」をクリック
3,「Sign up for Free Account 」をクリック
4,Twitter APIの利用目的の記入(250字以上)と利用規約の確認
| 【記入例】 Information is distributed to residents from a centralized distribution system. Information distributed by local governments to residents includes disaster information and disaster prevention information to protect themselves, and such information needs to be accurately and quickly conveyed to a large number of people. Currently, however, it is time-consuming and labor-intensive to prepare information for distribution to different media.The SpeeCAN RAIDEN system, which enables centralized distribution to a variety of media, is being used to streamline the process. Twitter is one of the destinations. |
5,「Submit」をクリックして送信
Ⅱ,APIキーとシークレットの取得
RAIDENと連携するための情報を取得します。
1,[Projects & Apps]>”アプリの画面” の「Edit」をクリック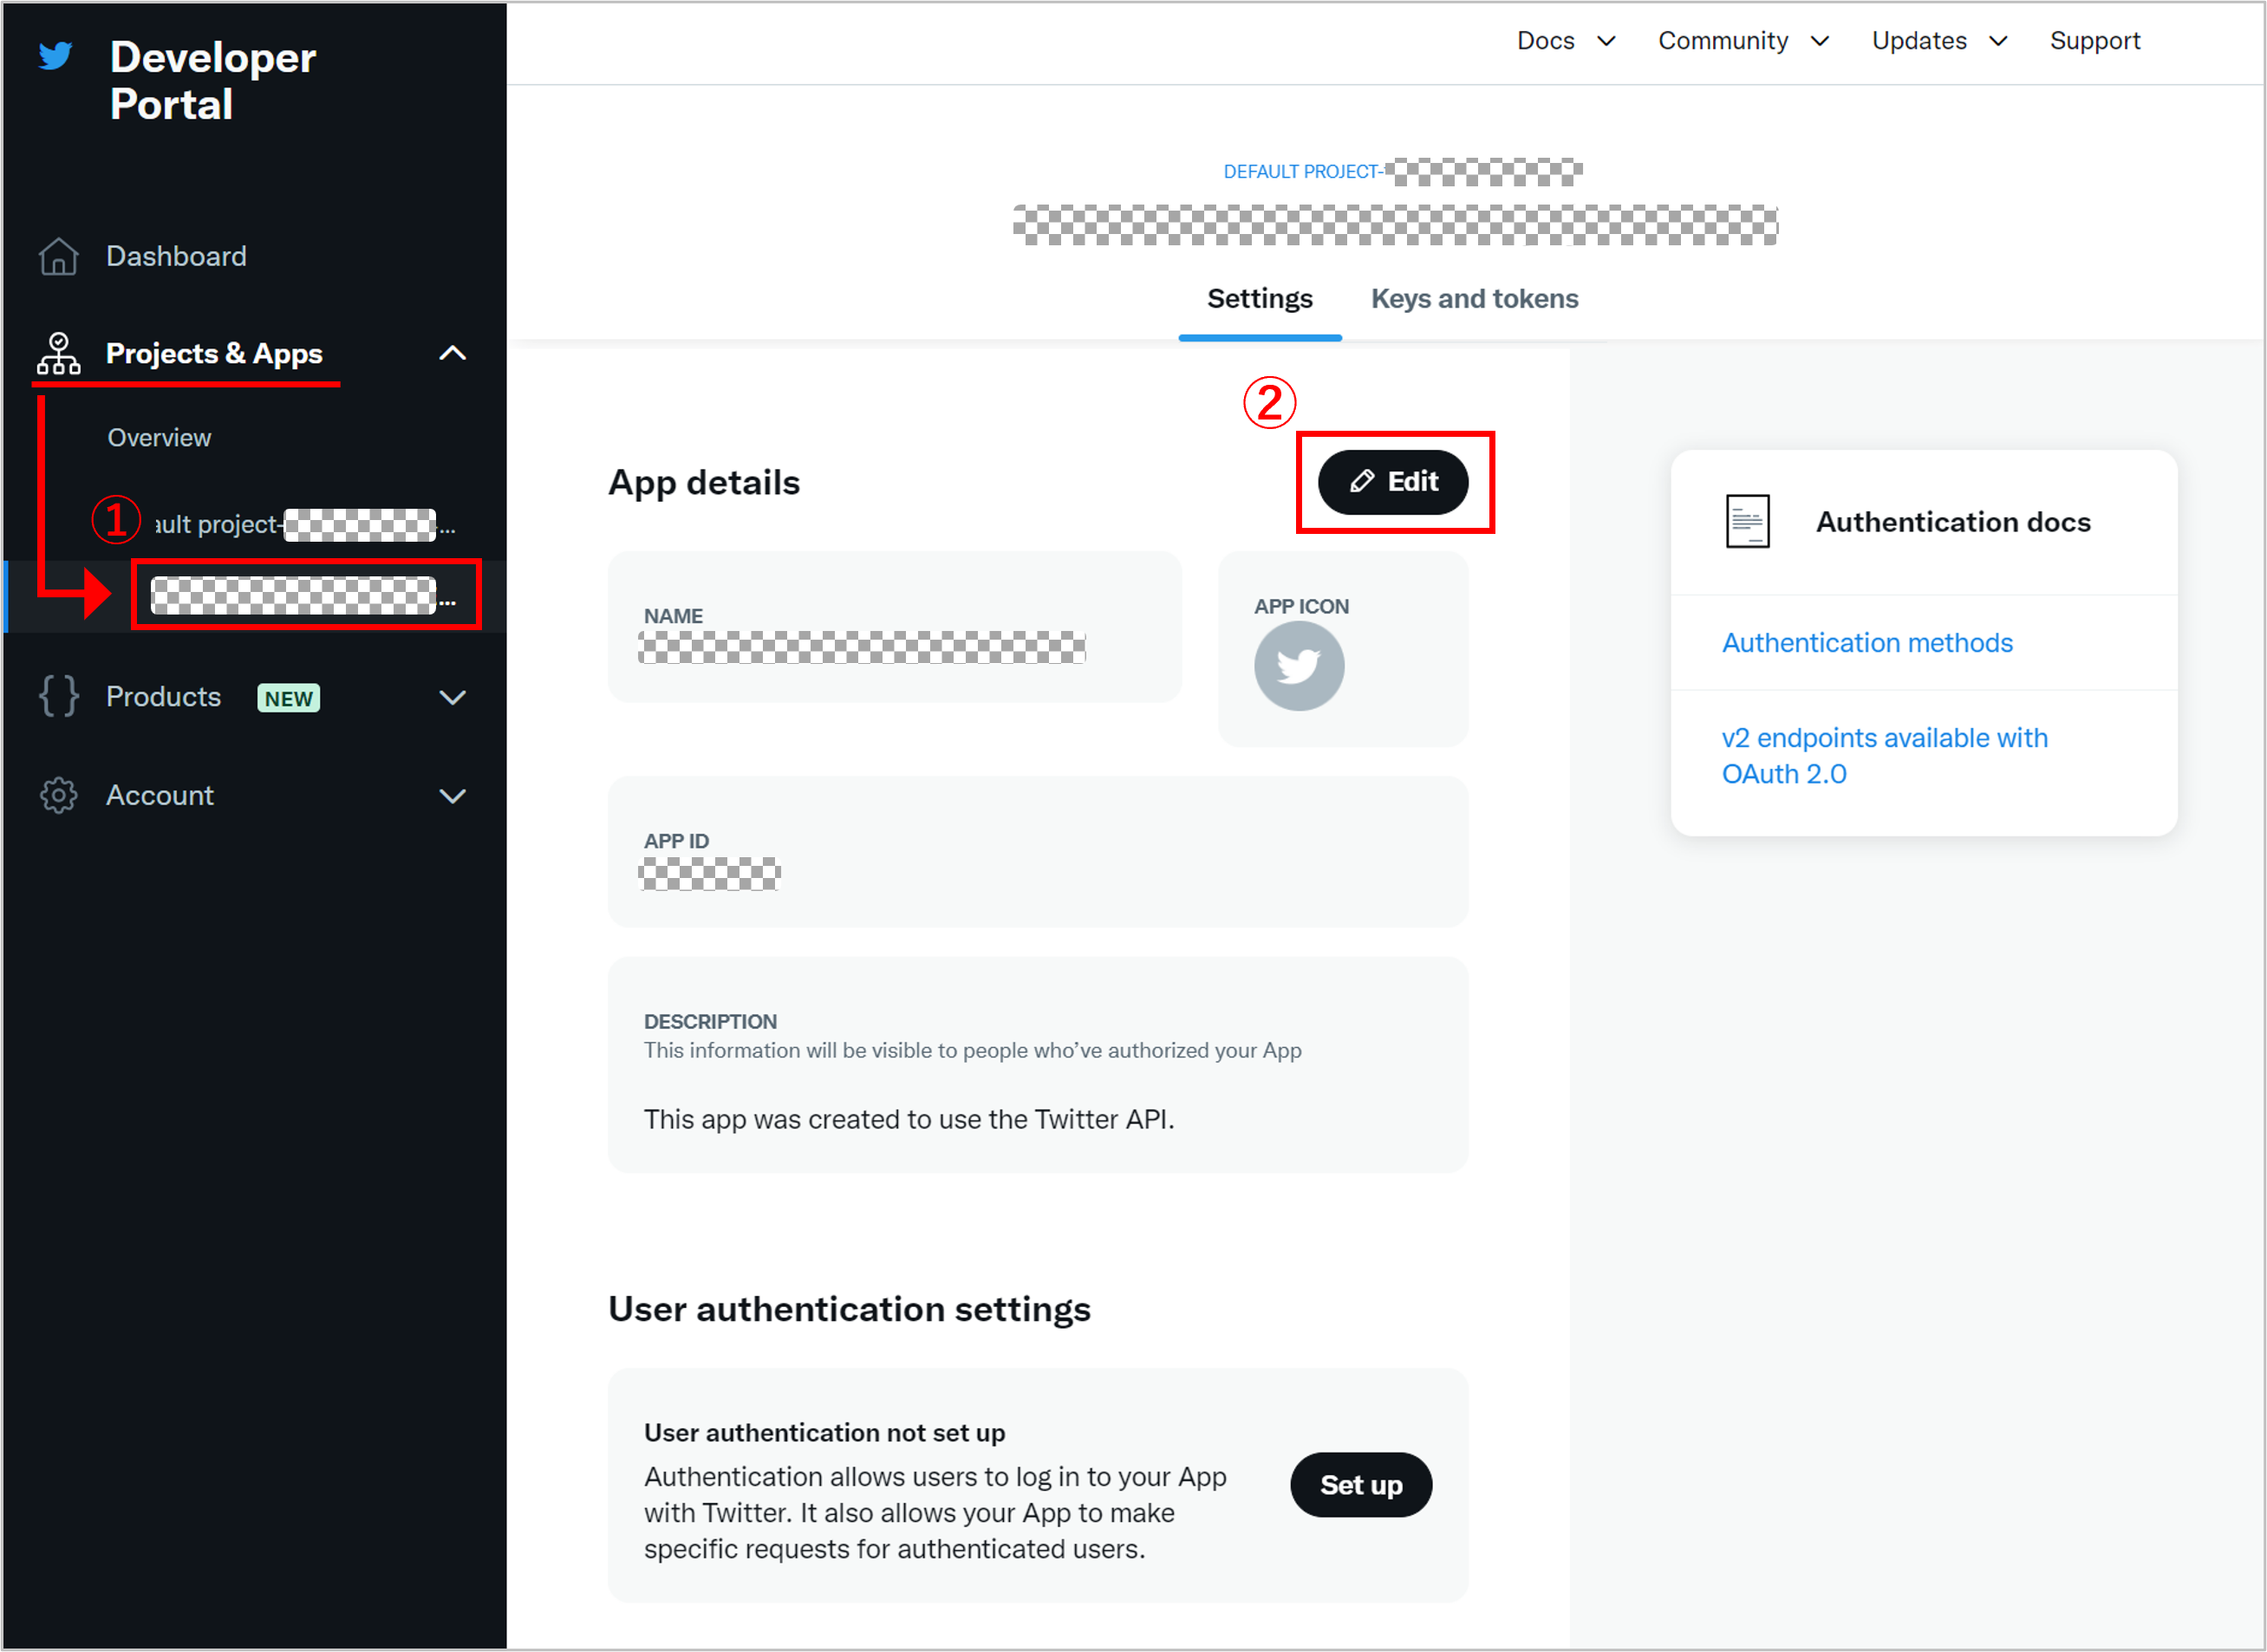
2,”App name” を自治体名に変更し、「Save」をクリック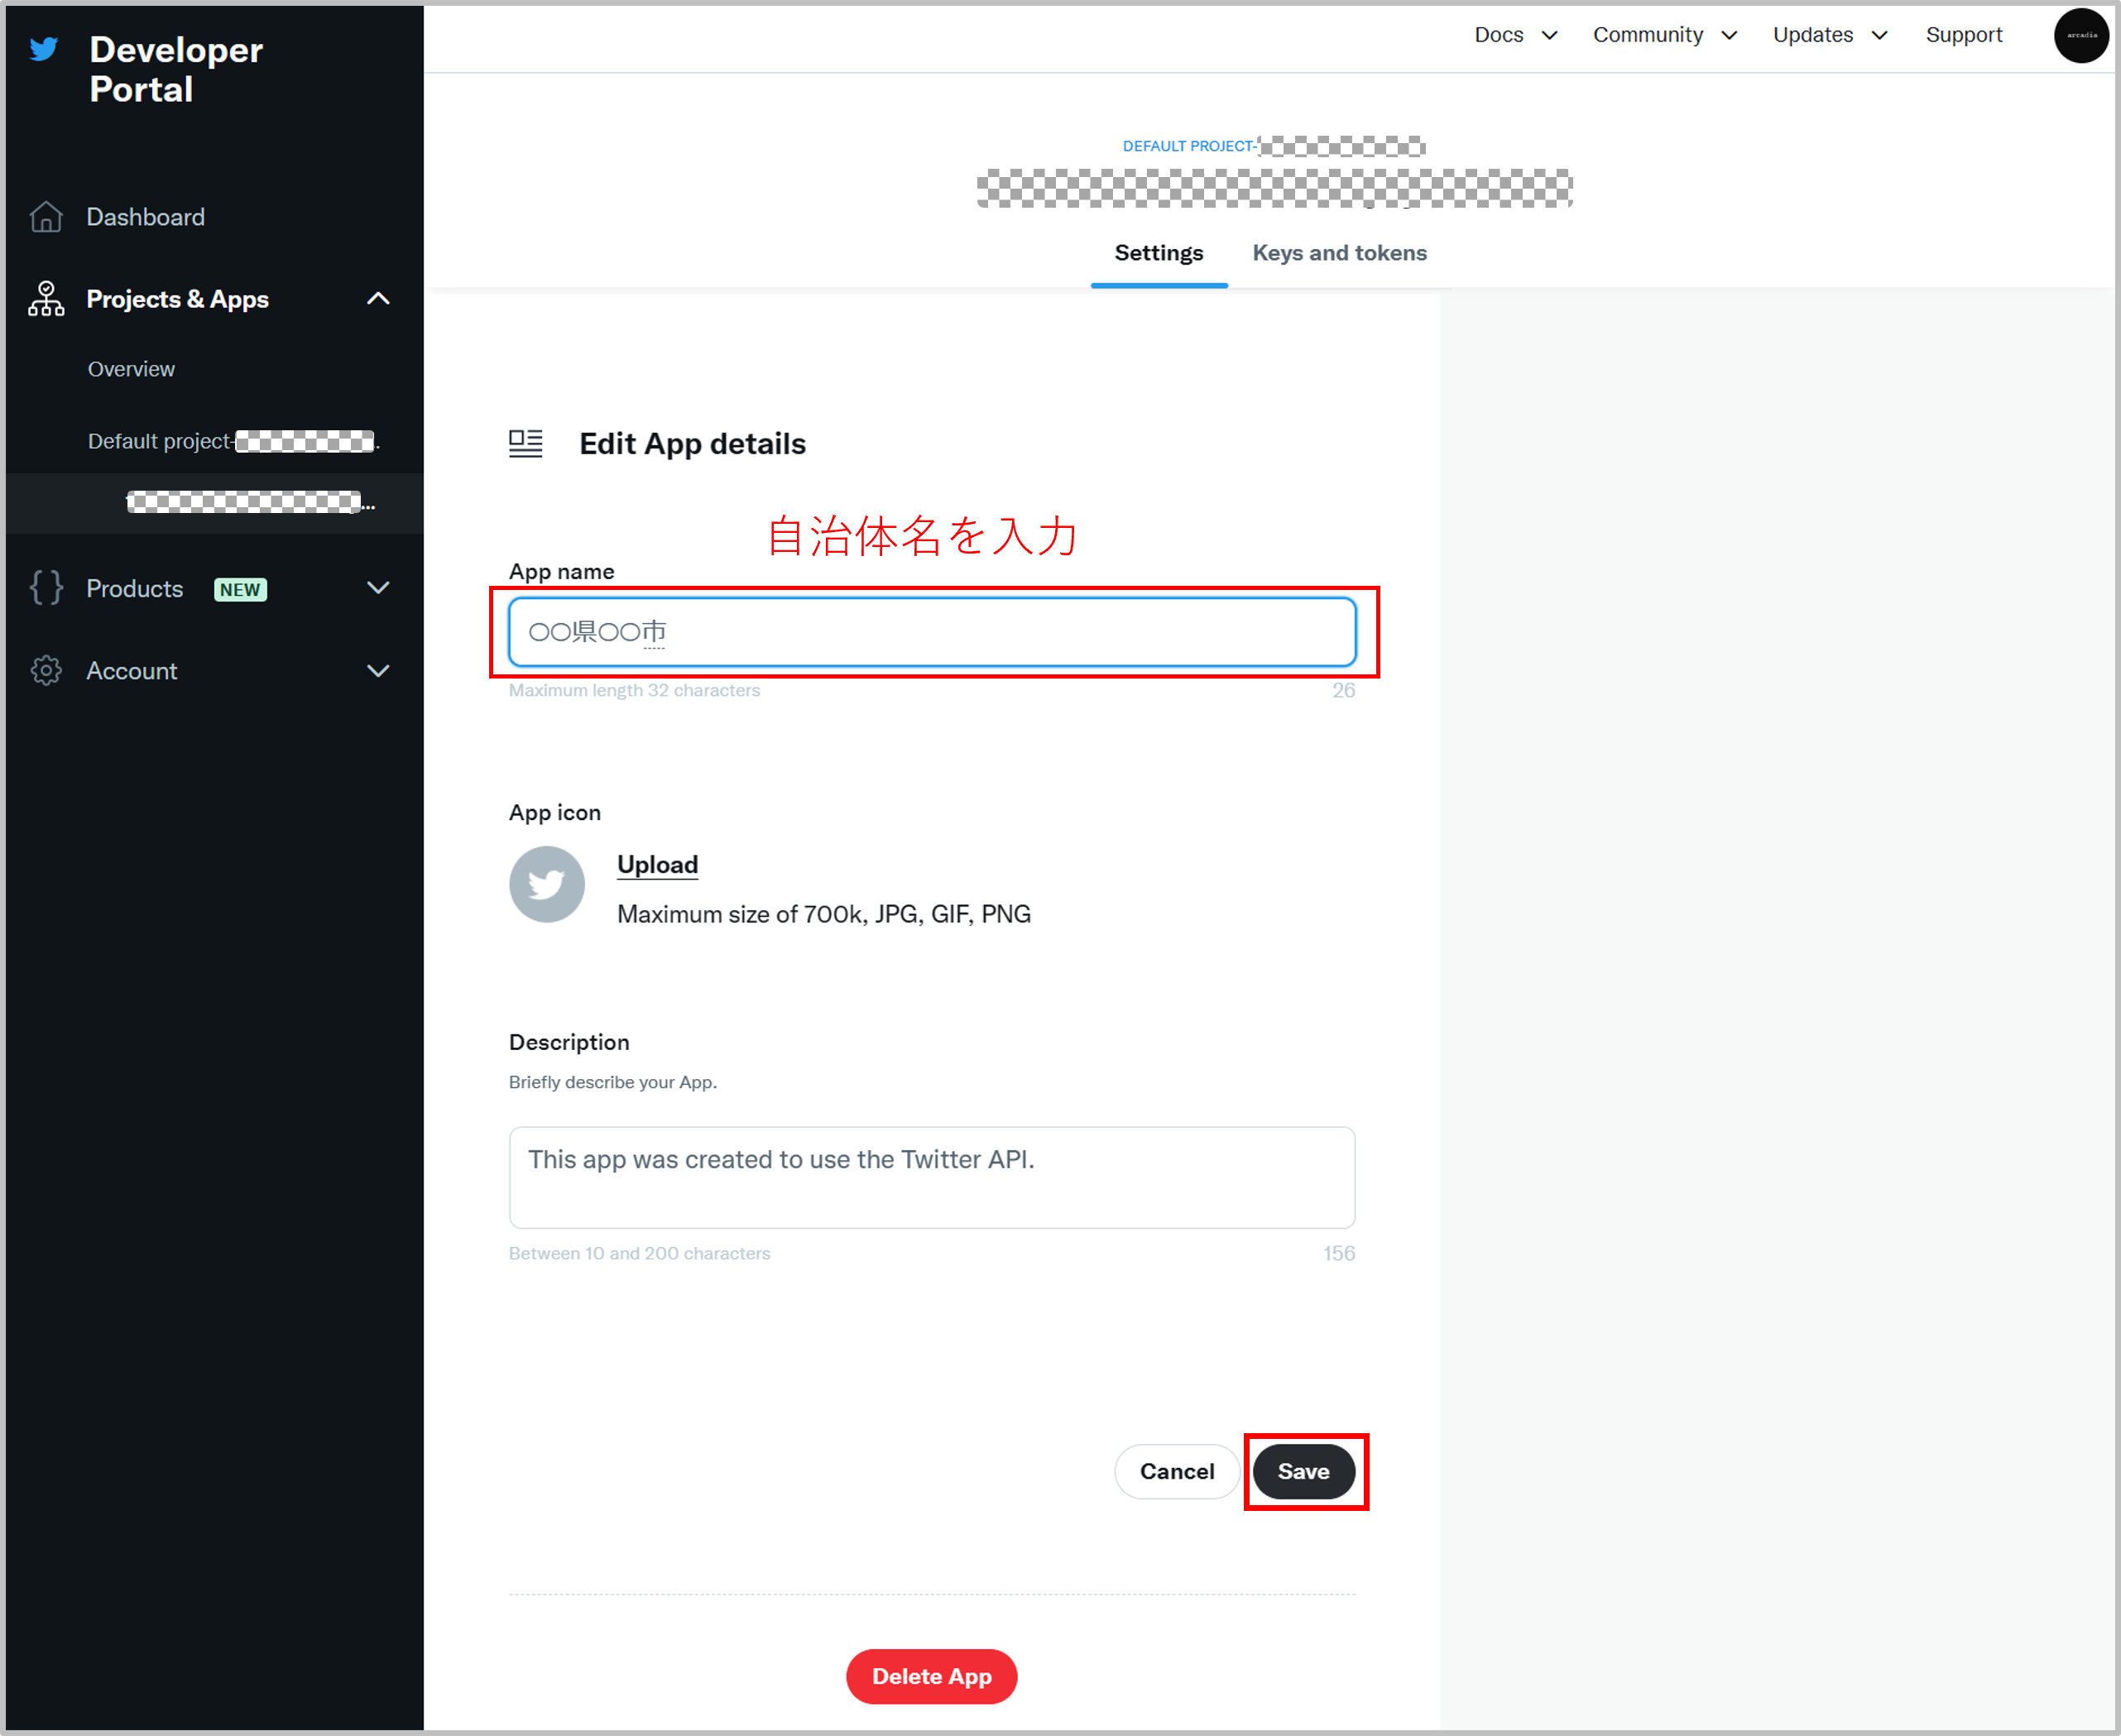
3,User authentication settings(ユーザー認証設定)の「Set up」をクリック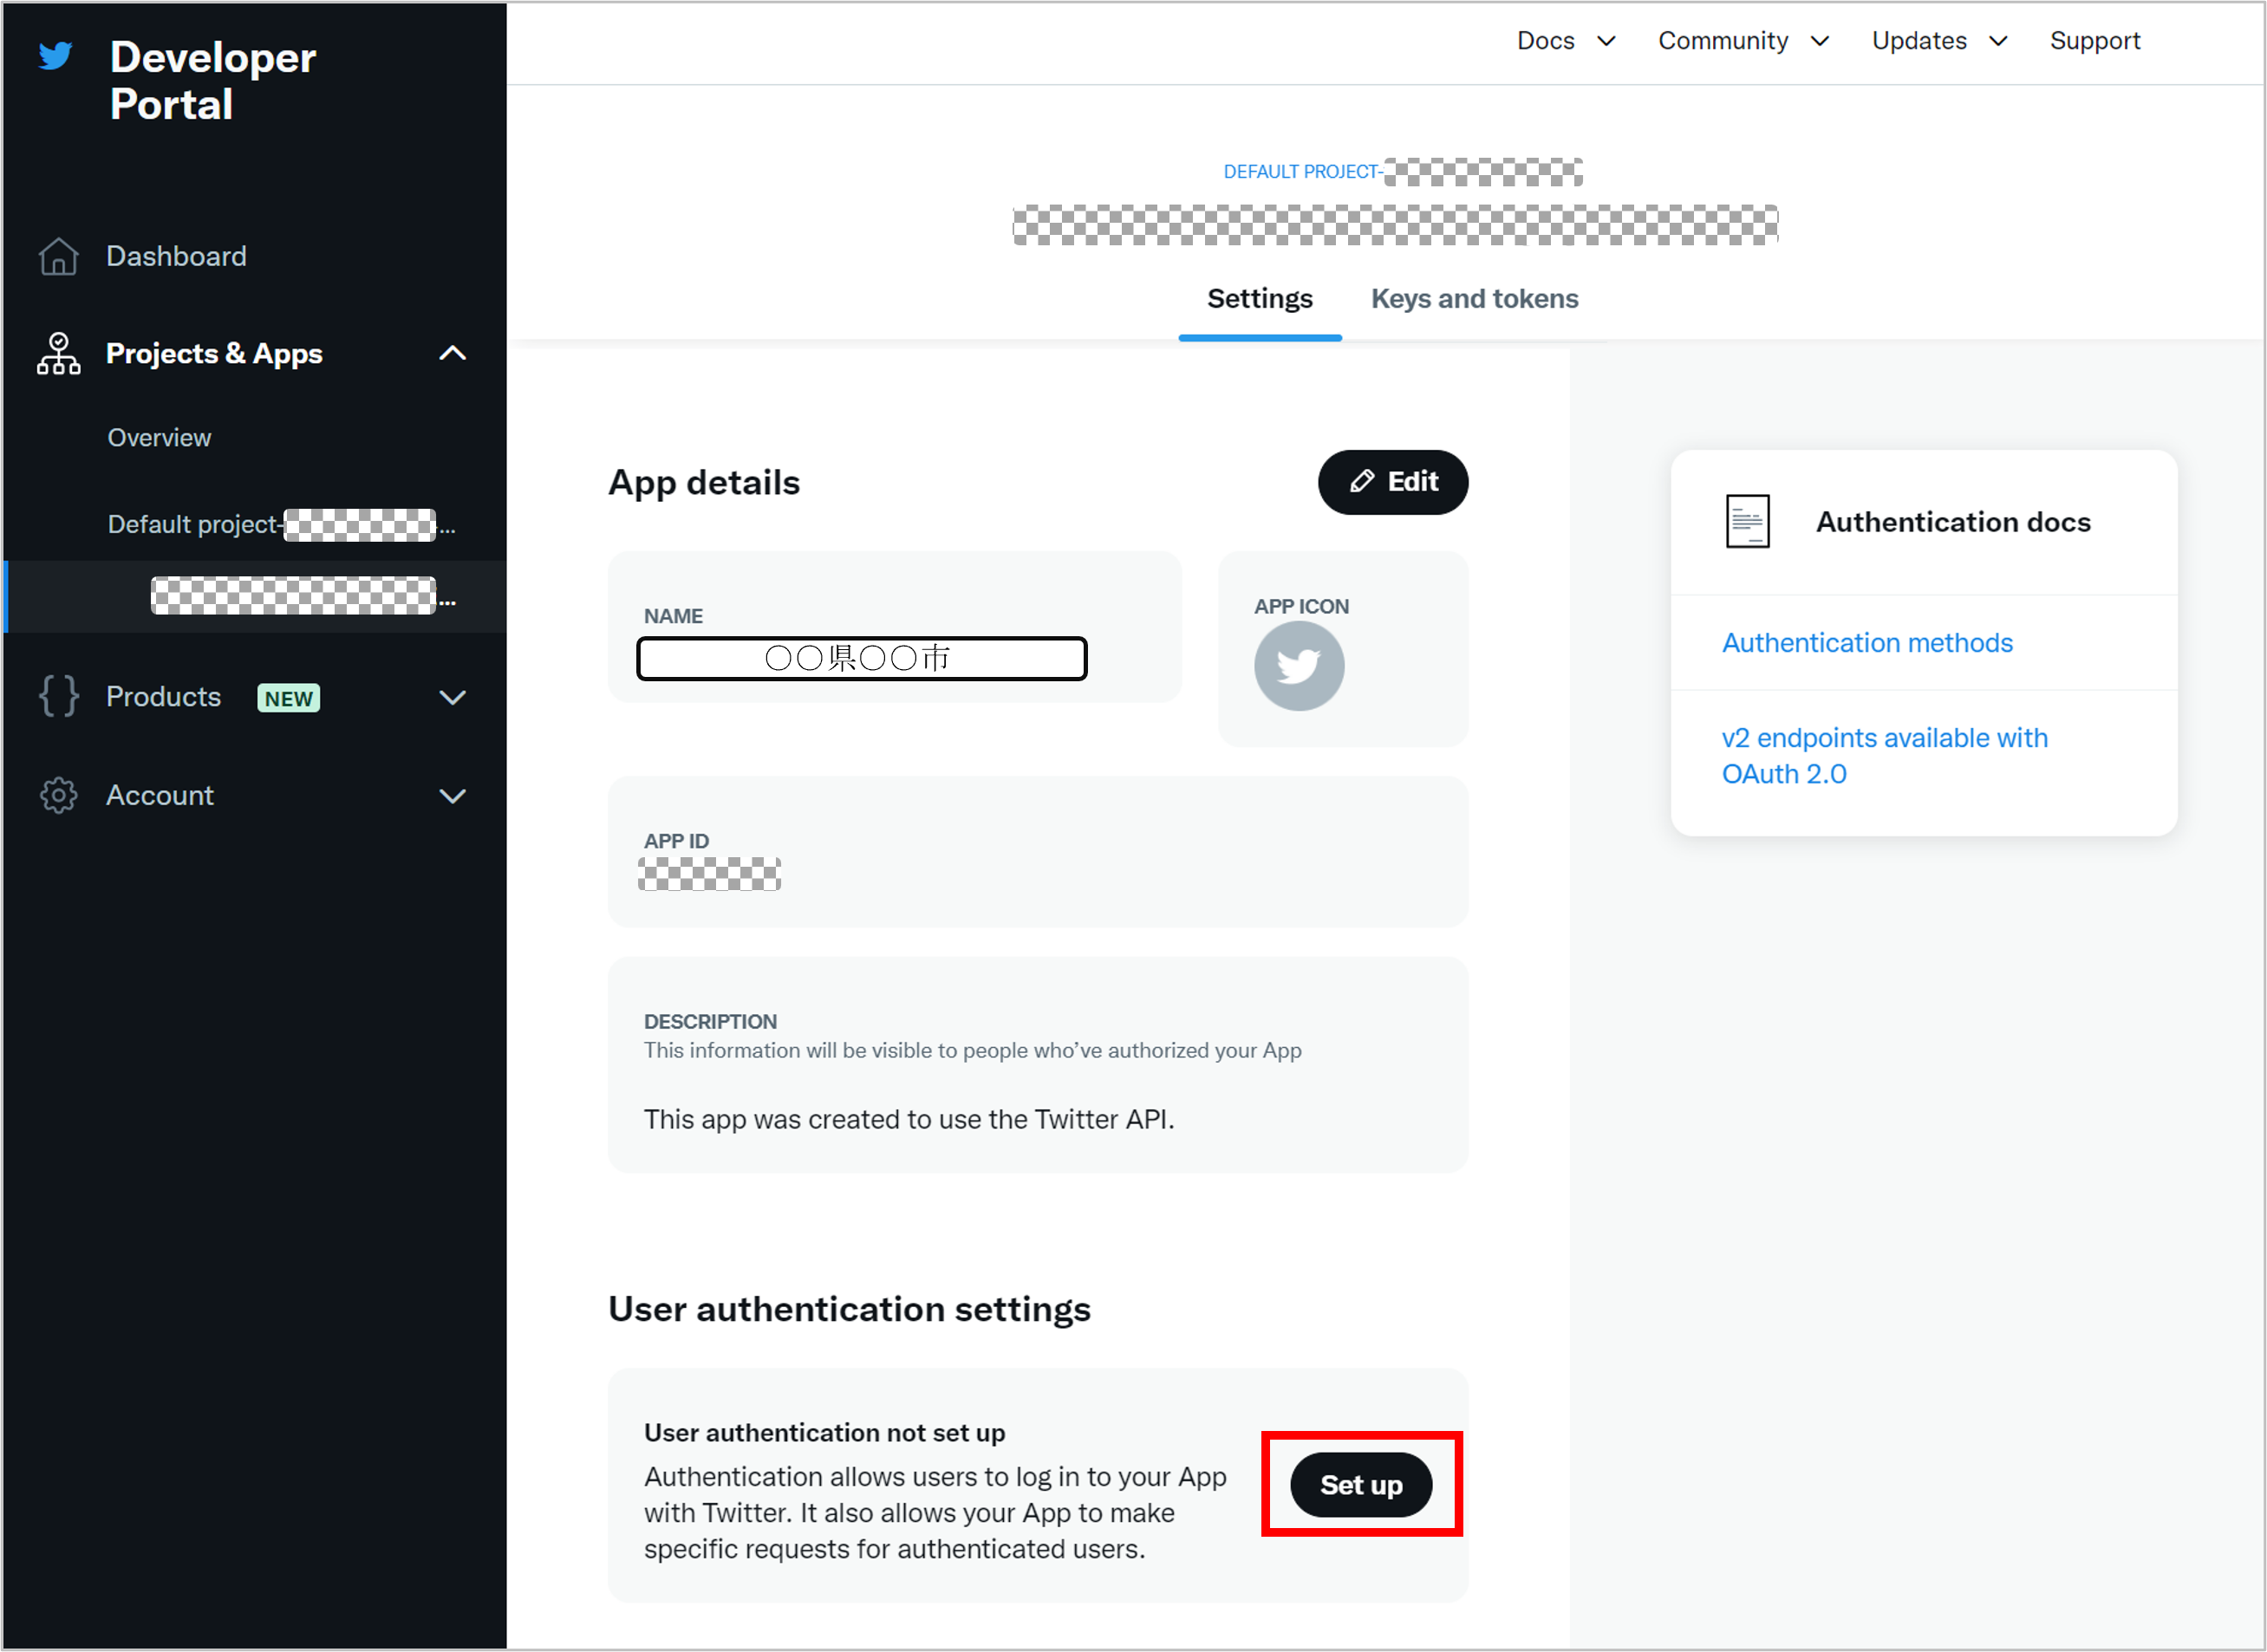
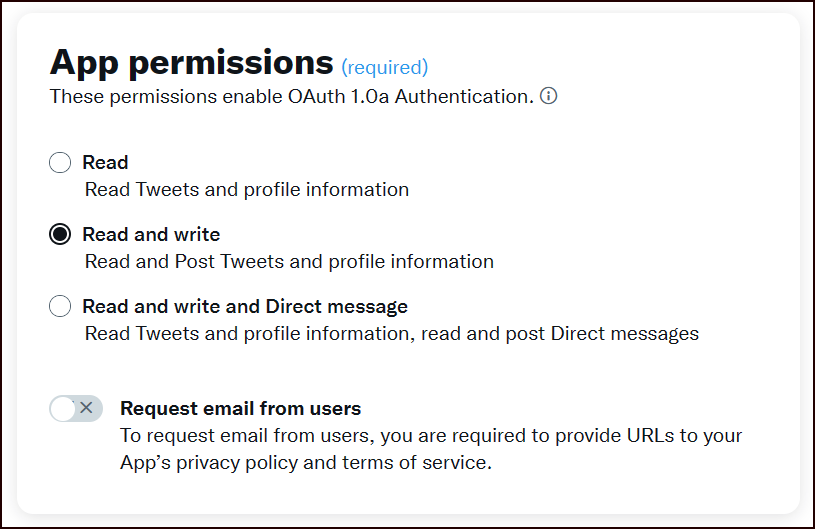
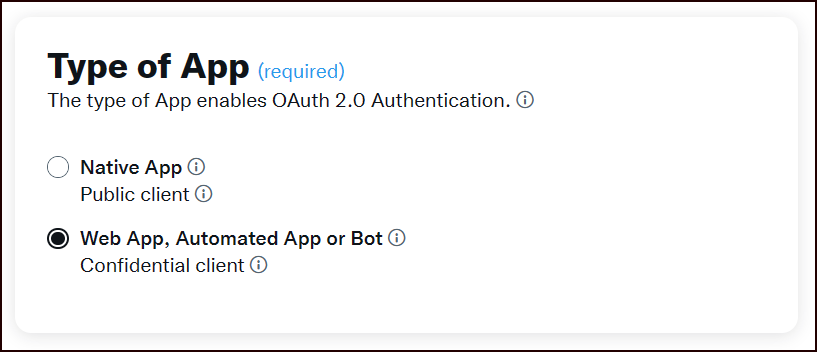
4,User authentication settings(ユーザー認証設定)を以下のように設定
App permissions:”Read and write” を選択
Type of App:”Web App, Automated App or Bot” を選択
App info:「Callback URI」と「Website URL」を入力
※入力する値はRAIDENのログインURLによって異なります(下表参照)。
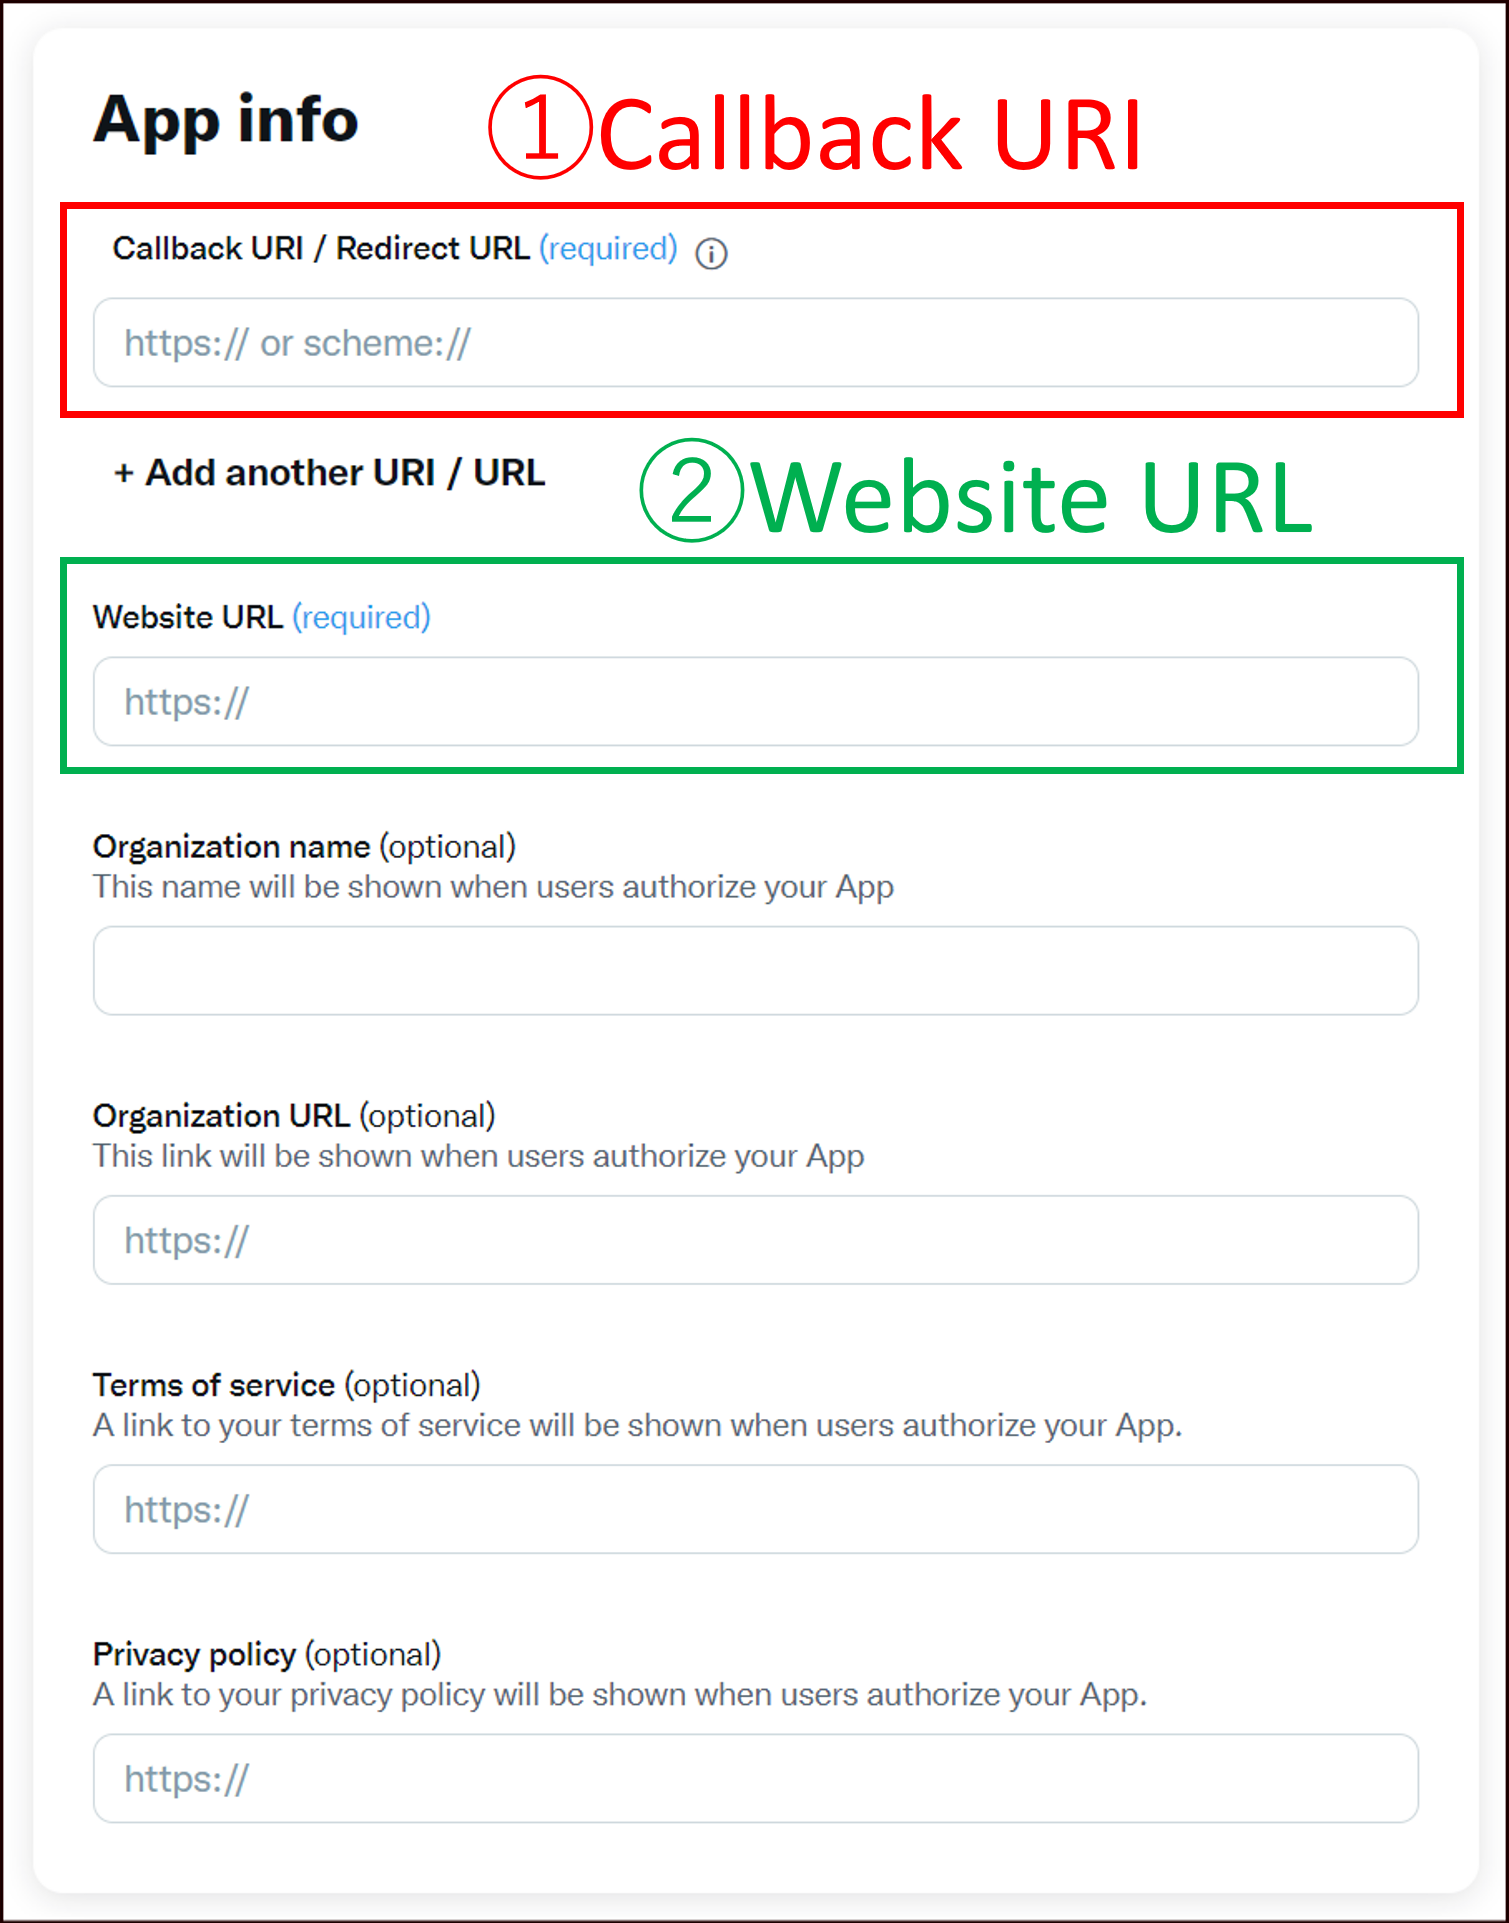
| RAIDENログインURL | ①Callback URI(入力する値) | ②Website URL (入力する値) |
|---|---|---|
| https://raiden.ktaiwork.jp/ | https://raiden.ktaiwork.jp/admin-exmethod/custom-action-twitter-authcallback | RAIDENログインURL |
| https://raiden2.ktaiwork.jp/ | https://raiden2.ktaiwork.jp/admin-exmethod/custom-action-twitter-authcallback | RAIDENログインURL |
| https://raiden3.ktaiwork.jp/ | https://raiden3.ktaiwork.jp/admin-exmethod/custom-action-twitter-authcallback | RAIDENログインURL |
5,「Save」をクリック
6,”Changing permissions might affect your App” の「Yes」をクリック
7,”Client ID” と “Client Secret” を取得、「Done」をクリック
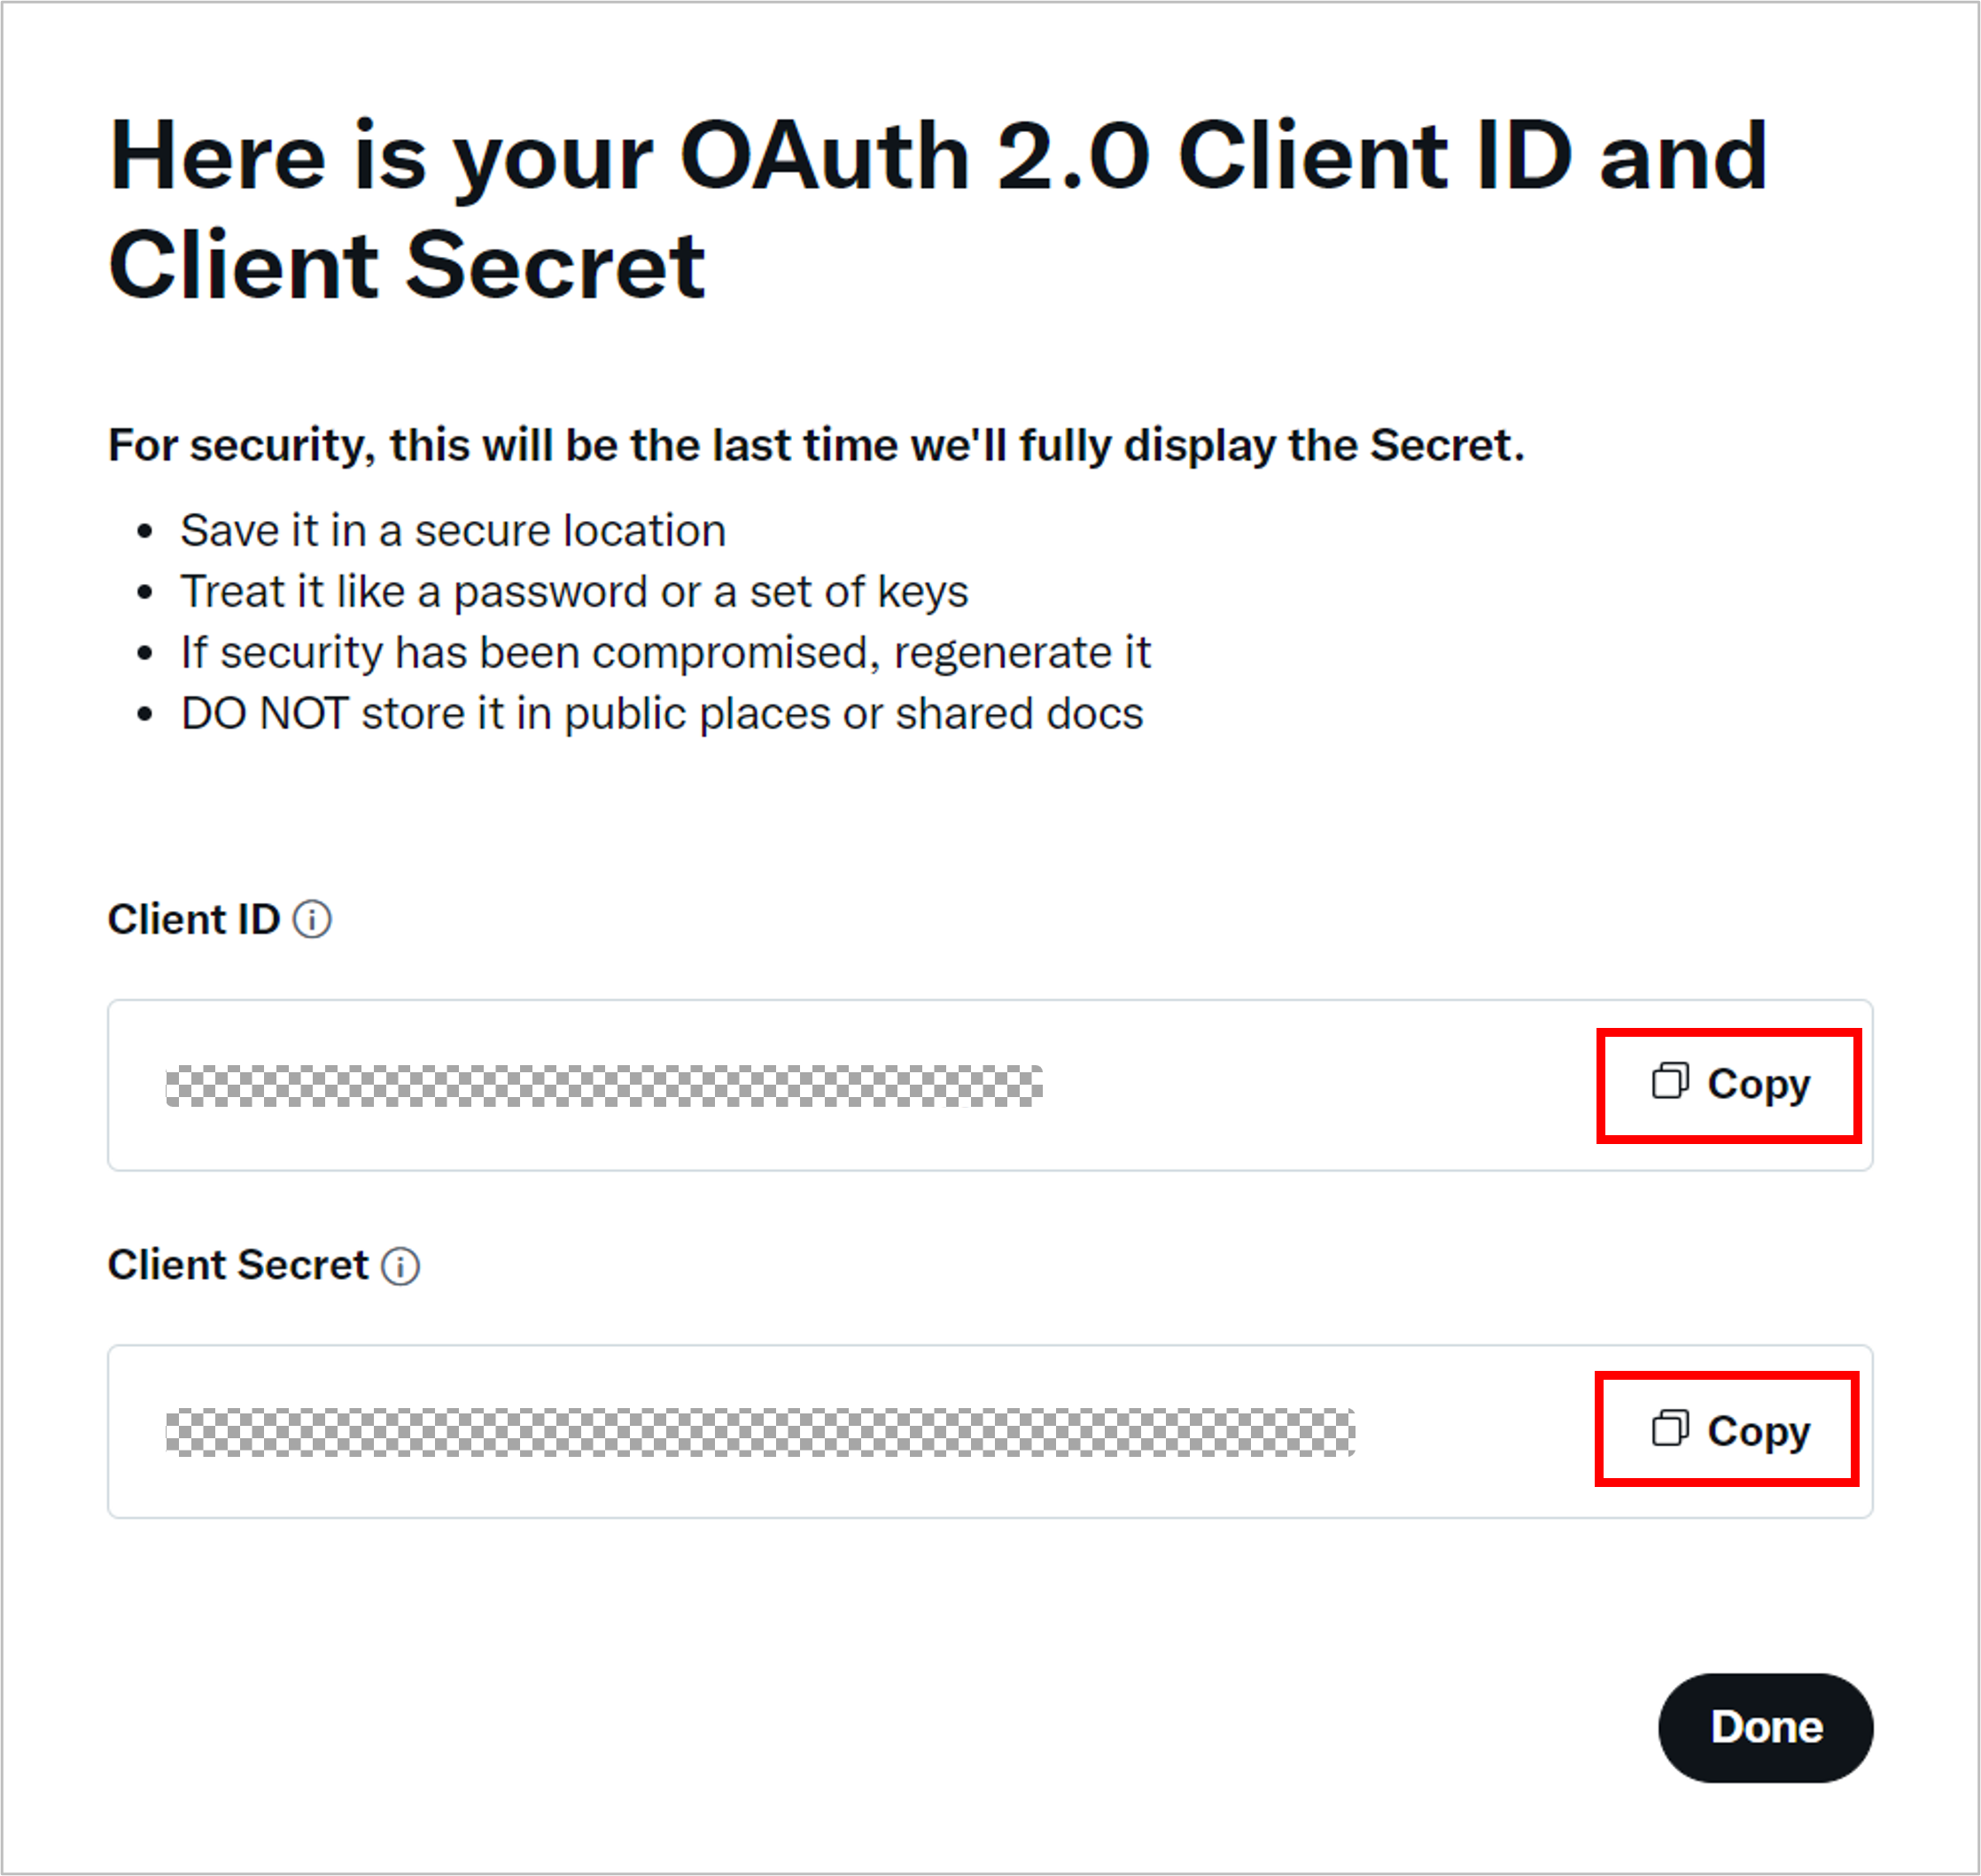
8,”Save your OAuth 2.0 Client Secret” の画面の「Yes, I saved them」をクリック
Ⅲ,RAIDENへ連携設定
連携情報を取得しましたら、弊社担当者にご連絡ください。認証情報を入力する画面を設定いたします。
1,RAIDENへログイン
2,[管理画面] – [拡張設定] – [Twitter] の画面へ移動
3,認証情報の枠に、Ⅱ-7で取得した “Client ID” を入力し、改行をして
二行名に”Client Secret“を入力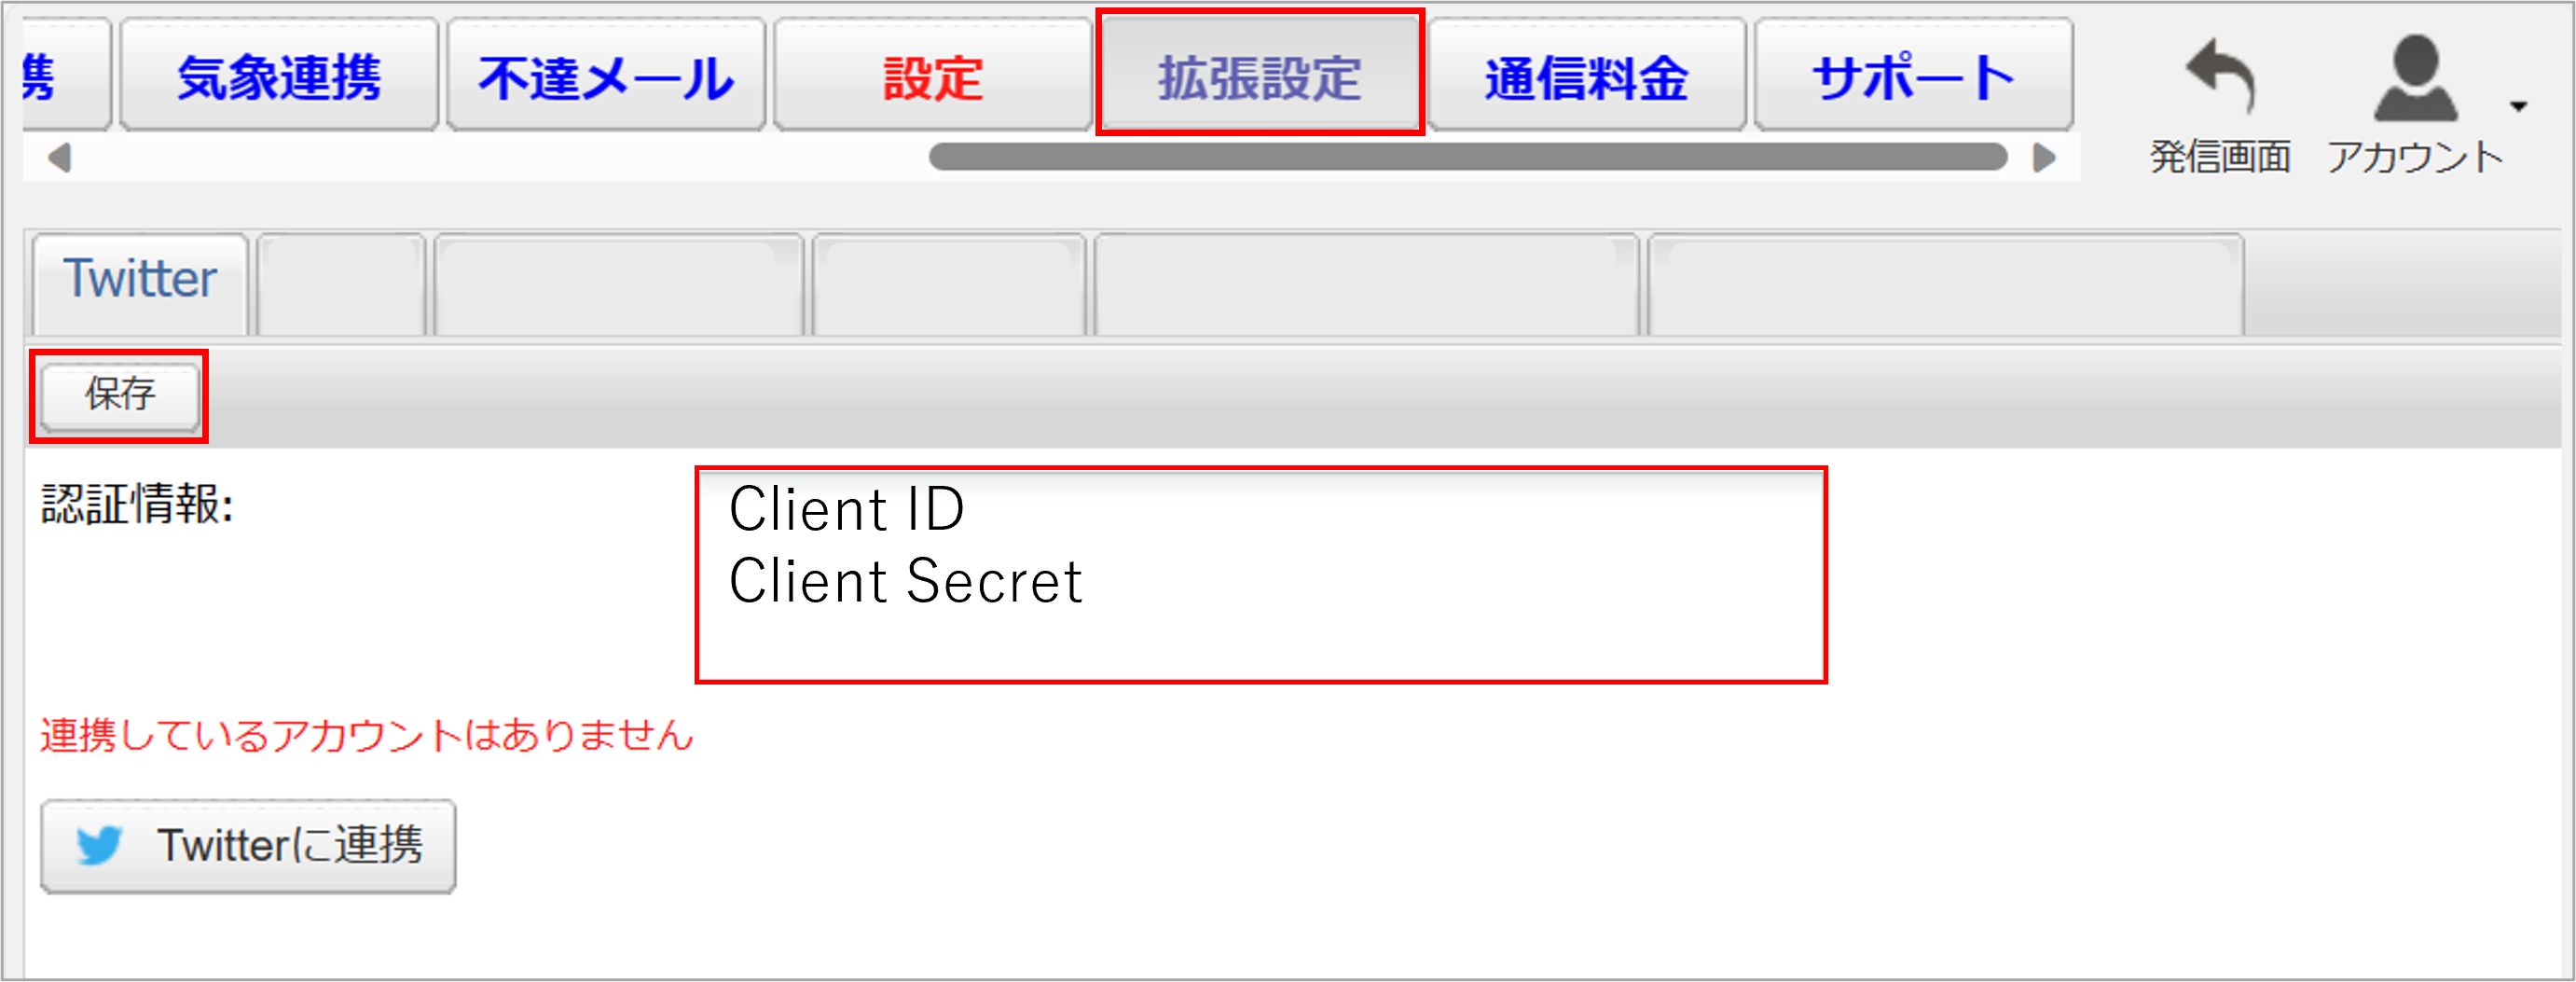
4,一度「保存」をし、「Twitterに連携」をクリック
5,Ⅱ-2で変更した “App name” が表示されていることを確認し、
「Authorize app」をクリック
6,連携中のアカウントに、連携させたいアカウントが表示されていること確認
7,連携設定完了